
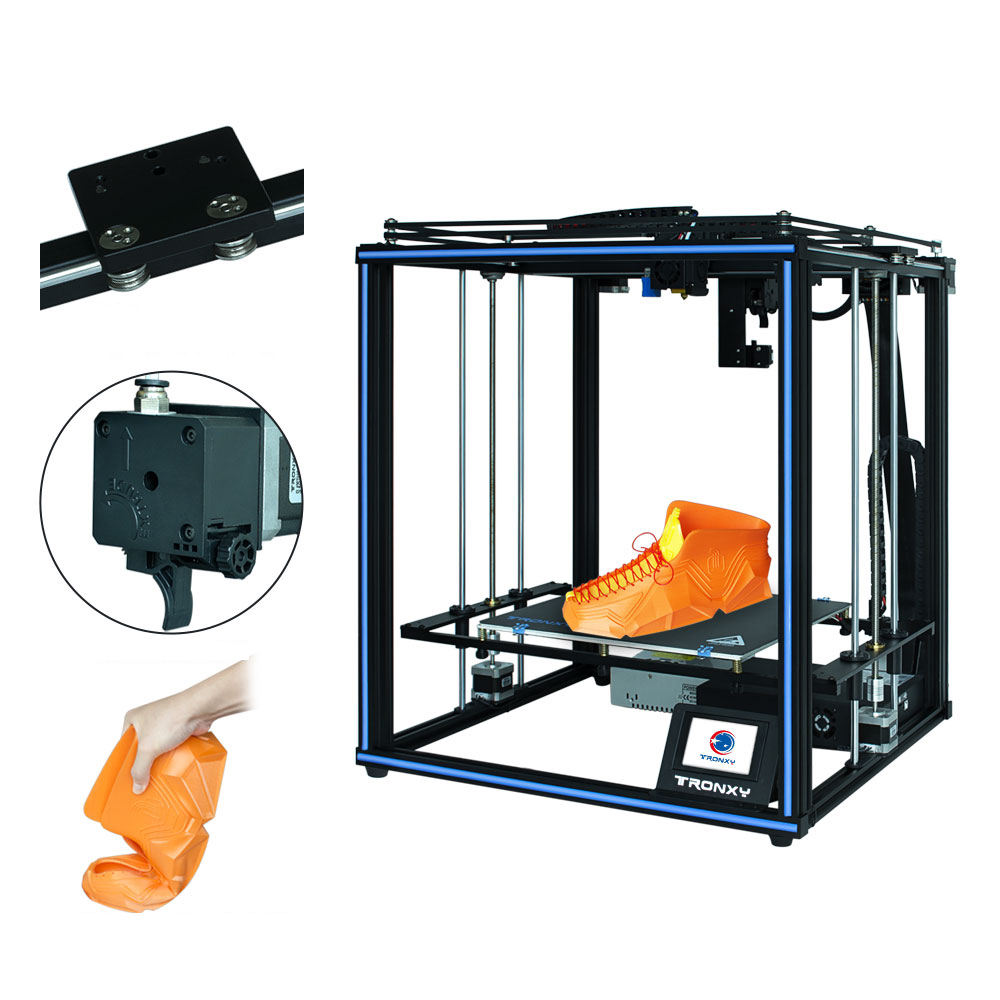
![TRONXY® X5SA-400 PRO DIY 3D Printer Kit - 400*400*400mm Core XY with Titan Extruder, Auto Leveling, Filament Detection, Power Resume - [Ships from EU/US]](https://imgaz1.staticbg.com/thumb/large/oaupload/banggood/images/47/8C/bd6f3f3b-cbbb-4e61-9182-1c5865962004.png)


In stock

In stock

In stock
| Standing screen display size | 17.3 Inches |
|---|---|
| Screen Resolution | 1600 x 900 pixels |
| Max Screen Resolution | 1600×900 Pixels |
| Processor | 4.5 GHz ryzen_5 |
| RAM | DDR4 |
| Hard Drive | 2 TB SSD |
| Graphics Coprocessor | AMD Radeon R5 |
| Chipset Brand | AMD |
| Card Description | Integrated |
| Wireless Type | 802.11ax |
| Number of USB 3.0 Ports | 3 |
| Brand | HP |
| Series | HP 17.3 Touchscreen Laptop |
| Item model number | HP 17.3 Touchscreen Laptop |
| Hardware Platform | PC |
| Operating System | Windows 11 Home |
| Item Weight | 4.58 pounds |
| Product Dimensions | 15.78 x 0.78 x 10.15 inches |
| Item Dimensions LxWxH | 15.78 x 0.78 x 10.15 inches |
| Color | Silver |
| Processor Brand | AMD |
| Number of Processors | 6 |
| Computer Memory Type | DDR4 SDRAM |
| Hard Drive Interface | Solid State |
In stock

In stock
In stock
In stock
In stock
| Weight | 9 lbs |
|---|---|
| Package | Yes |
| Packing | Carton Box |
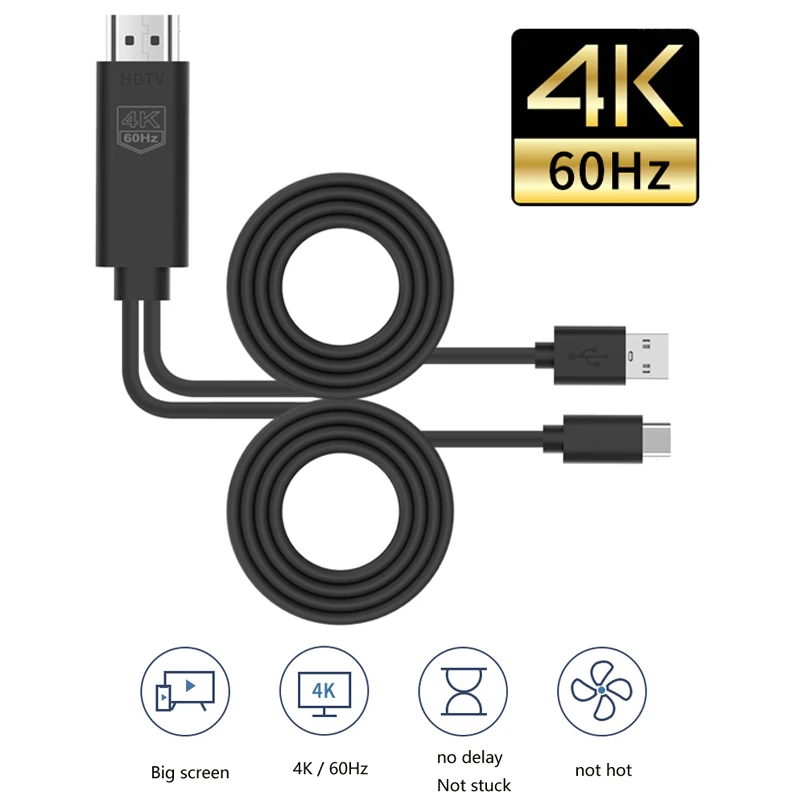
| Application | Television,Projector |
| Type | Type-C Cables |
| Connector B | USB,Type-C |
| Connector A | Type-C |
| Model Number | UC502 |
| Gender | Male-Female |
| Brand Name | ONTEN |
| Origin | Mainland China |
| Certification | NONE |
| tv stick | tv stick |
| screen mirroring device for tv | screen mirroring device for tv |
| Type-C To HDMI | Type-C To HDMI |
| Plug and Play | Plug and Play |
| for Macbook Phone Display HDTV Projector | for Macbook Phone Display HDTV Projector |
| for Mac OS WindowsLinuxAndroidIOS | for Mac OS /Windows/Linux/Android/IOS |
In stock
| Weight | 9 lbs |
|---|---|
| Bundle | Bundle 1 |
| Package | No |
| Outer Diameter | – |
| Packing | Polybag |
| Application | Multimedia,DVD Player,Television |
| Type | HDMI-Compatible Cables |
| Connector B | HDMI-Compatible |
| Connector A | HDMI-Compatible |
| Model Number | SA00024 |
| Gender | Male-Female |
| Brand Name | PoetrySail |
| Origin | Mainland China |
| Certification | NONE |

In stock

In stock
In stock

In stock

In stock

In stock

In stock
In stock
In stock
No account yet?
Create an Account Out of stock


Reviews
Clear filtersThere are no reviews yet.